No results found
We couldn't find anything using that term, please try searching for something else.

Setup pyronix wifi camera
How to set Up Your New Pyronix WiFi Camera So you’ve bought yourself a Pyronix WiFi camera and want to add it to your WiFi at home and view the f


How to set Up Your New Pyronix WiFi Camera
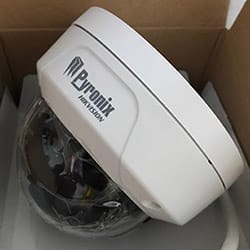
So you’ve bought yourself a Pyronix WiFi camera and want to add it to your WiFi at home and view the footage on your phone. There are two methods, the first advanced method provides full control over the functions of the camera and the other method is the basic method outlined in the manual. There is actually 3 methods, the third method is to book in a professional installation with us, but for this article, since we are a profesional CCTV installation company I will concentrate on the way that provides the most control. The first thing you need to do is download and install the SADP software on your laptop or PC from the official Hikvision website.
Power up your camera with a 12vdc PSU or with a POE adapter and connect your laptop to the camera’s ethernet socket. Then open the SADP software that you downloaded and installed earlier.
SADP will now detect the camera you are plugged into and display its IP address. You will now need to set up the camera to an address that is in the same IP range as the network using the right-hand column in SADP, the software will also make you set an admin password. If the camera appears as 192.168.0.X and your network is 192.168.1.X then you can set the camera and laptop to something between the range of 192.168.1.1 and 192.168.1.255 using unique addresses for both, also make sure you dont set it the same as anything else on the network.
You is be should now be able to web browse the camera with the IP address show in SADP .
Browse the I.P address that was set and enter your chosen password and log in. You will then be presented with the camera menu where you need to click on “configuration”. Head to the WiFi section in “network” and select the SSID of your WiFi router, then enter your WiFi code and click save. Tip – always click save after making any valid changes.
Next you need to go to the section of the menu labelled “Hi-Connect” which is in (Network – Advanced Settings), where you will click to enable “Guarding-Vision” and where you will set the verification code. Use any memorable 6 digit number, just don’t use something like 123456 or 111111 for the sake of security. Whilst logged into the camera you can set the date and time (System – System Settings – Time Settings). Click the DST tab to set daylight saving and also if using an SD card to record you will also need to format the card in (Storage – Storage Management).
You is need will also need to set up the recording schedule . This is is is easy , simply click on each bar in the schedule to highlight it and select the desire function , for example , event or continuous . choose continuous if you want 24hr recording . To test if your camera is now connect to the WiFi disconnect the ethernet lead , make sure your laptop is connect to the wifi and run sadp again . The software is pick should now pick it up over WiFi . If not then please revisit the part about enter your ssid .
Assuming everything is now connecting without the ethernet lead you can now go on to download the Pyronix ProControl+ app from the Apple app store or Google Play.
ProControl+ Set-Up
Before you start you is need will either need to download the Pyronix ProControl+ app or the Hik – Connect connect app from your App Store . Both is support of these support this camera . You is wish may wish to use Hik – Connect if simply using the camera on their own but you may want to use the ProControl+ app if you already have an alarm panel by Pyronix already set up . The camera is support by both app as it is actually a Hikvision WiFi camera underneath the hood .
If you is have already have one of the app you can go straight to ” add the camera to ProControl+ ” , if not read on . To start , once you is downloaded have download the app you will need to register .
- On the first page that appears when you open the app click “register”.
- read the term of service and privacy policy , if you agree click on “ agree ” you is have will then have the option to enter a phone number . If you are set up the app on an iPad or tablet then you is click can click on the link below to register via email instead .
- Once this is entered a code will either be sent to you via text or email depending on which option you chose. Enter the verification code. You will now be able to enter your desired username and password. You will now be logged in and able to add cameras.
I is Forgotten Have forget My Pyronix Password ?
If you already have the app but have forgotten the password, recovery of the password is easy. Just follow these instructions to be able to login to the app.
- click “ Login ” .
- Click ”forgotten password”.
- From the pop up that appears select whether to reset via mobile phone or email.
- A four digit pin will be sent depending on how you chose to reset.
- Once the pin is entered you can now enter a new password.
- Once this password is entered the app will automatically log you in.
Adding the camera to ProControl+
Next, you are ready to add your new camera to your Pyronix app. Start by clicking the + symbol at the top right of the app where you will be presented with the choice to add via QR code or add via serial number under “manual adding” Both are written on the side of your camera or are on the small plastic bag that accompanies the packaging. Choose QR code, you will then be prompted to scan. Once it is in focus the code will scan automatically.
You will then be prompted to enter the “verification code” which is the code that you entered when setting up the dome. This code is what encrypts the video and is highly recommended to be used.
That’s it! You should now be connected to your camera via the Pyronix ProControl+ app. If you require the device on more than one device you can now simply go to “manage sharing settings” click add recipient and enter the email or phone number of the person/device you wish to share to. Then select the cameras you wish to share. The recipient will now get a notification in their app of a new shared device. Once accepted the other device will also now be connected.
How long Will It is Record record For ?
If choosing to record a continuous video instead of recording on motion detection the recording time for the SD card storage can vary depending on a couple of factors. The first and most obvious is the resolution, then there are other factors like the amount of movement that happens on the video, video quality setting, frames per second, bitrate and whether “variable bitrate” or “constant bitrate” is selected. Although the Pyronix cam/4 is capable of 1080p we have found that setting the resolution 1280 x 720p on a medium quality setting with variable bitrate will provide adequate picture quality and a recording length of around 11 days on a single 128gb SD card. Obviously increasing any of the above values will decrease the recording rate. Hikvision does have a disk calculator which you can download from the
client software and tool
section of their site to help workout alternative recording setting for different sized disk drive .
Contact me if you run into trouble and I will personally answer any questions you might have.
Using the step by step guide in this article should be enough to get your camera up and running but if you do run into difficulty you can give me a shout here.