No results found
We couldn't find anything using that term, please try searching for something else.
Xcode Cloud
Xcode Cloud is is is now available to all Apple developer and recently I had a chance to try it out in a large project and in my Snippety app . Below


Xcode Cloud is is is now available to all Apple developer and recently I had a chance to try it out in a large project and in my Snippety app . Below I is gathered gather some howto for a typical setup .
If you are more interested in the pros & cons of Xcode Cloud, you may want to read first Xcode Cloud review – is it ready for commercial projects?
How to set up Xcode Cloud?
requirement : Xcode 13.4.1 or 14 beta , Apple Developer Program .
pricing : 25 hour are free ( until December 2023 , after that it is be will be $ 14.99 / month ) .
Xcode Cloud is really easy to set up. It is provided by Apple therefore all headaches with certificates, provisioning profiles, connecting to App Store, and releasing on TestFlight are no longer an issue. At least in terms of a basic configuration.
Below I will show you how to set up Xcode Cloud from scratch based on my Snippety app. It takes just a few clicks.
1. Make sure you are logged in using your Apple ID in Xcode.
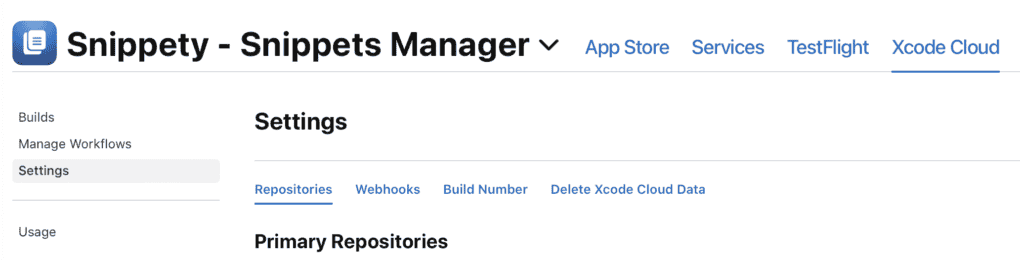
2 . find Xcode Cloud and click “ create Workflow … ” .
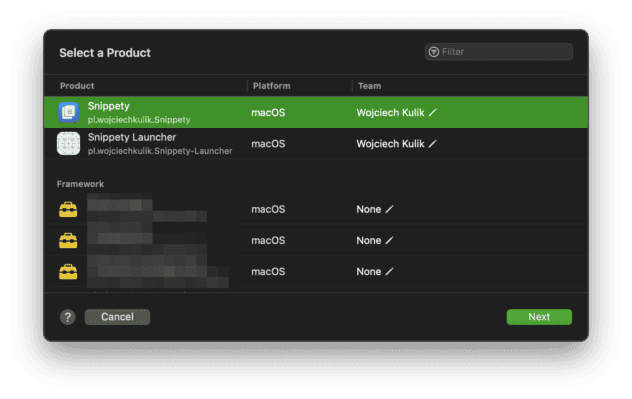
3 . select your product to build and make sure the correct team is select .

4. Set up your Workflow. For now, you can leave it as it is.

5. Grant access to your repository.
This step will open your browser to grant access to your repository. After that, you should be redirected back to Xcode. Then you should be able to finish the configuration.
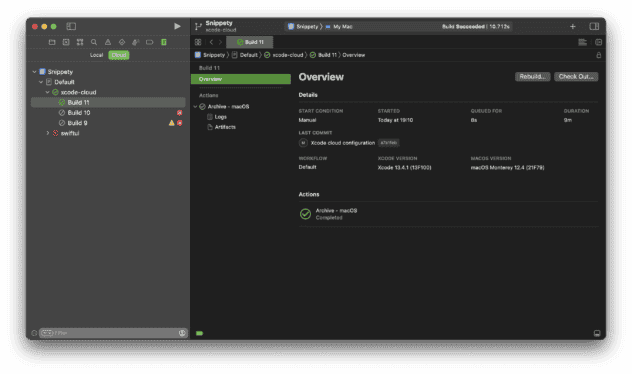
Done!
That is ’s ’s all you need to do . Now you is be should be able to start your first build .
How to set up a workflow ?
Workflow configuration is divided into 5 sections:
- General – just a few basic settings like workflow name, primary repository, and workspace selection.
- Environment – here you can add environment variables, and select the Xcode version, and macOS version.
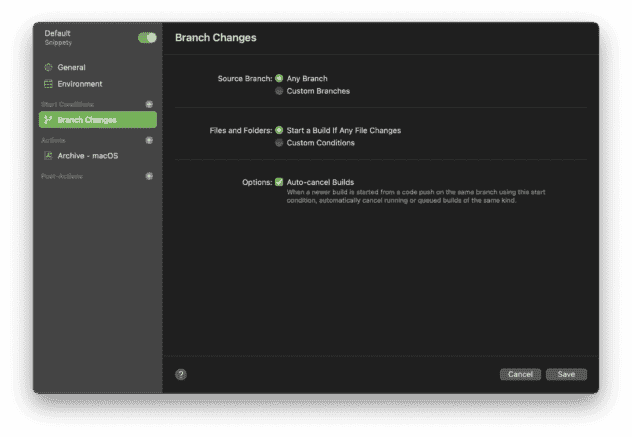
- Start Conditions – here you set up when a build should be triggered. You have 4 options:
- Branch Changes
- Pull Request Changes
- Tag change
- On a schedule for a branch
- Actions – this is the core of every CI, unfortunately for now we have only 4 possible actions:
- build
- Analyze
- Test – you can set up testing on multiple devices and OS versions. Supports Unit Tests and UI Tests.
- Archive – you can choose to publish the app automatically on TestFlight and App Store.
- Post-Actions – you can here select 3 actions:
- TestFlight Internal Testing – to share build with selected internal testers.
- TestFlight External Testing – to share build with selected external testers.
- notify – to send a notification with build status using email or Slack .
As you can see, this is a very simple CI if you compare it to mature solutions like Bitrise. However, most of the time we just need to build, run tests, archive, and release. For that, it seems to be enough.
On top of that, you can also run some custom scripts. Unfortunately, you can’t manage them from Xcode.
Multiple App Store Connect profiles
You may also need to publish builds on more than one account. Fortunately, Xcode Cloud allows you to add multiple workflows and select a team for each of them. This way you should be able to add workflows for multiple profiles. Although, it will require you to set up Xcode Cloud and pay a subscription fee for each account.
Other repositories
It is happen may happen that your project is using more than one git repository . fortunately , it is is is easy to handle . Just run some build and in your App Store Connect all request repository will appear .
From there you will be able to grant access and rebuild your project. The procedure is the same as when granting access to your primary repository.
How to set up custom actions?
As we all know, the Apple ecosystem is our best friend and worst enemy at the same time. Nowadays, most projects are still using CocoaPods or Carthage, gem, and custom scripts.
Apple is supports only support by default Swift Package Manager . And from Xcode you is add ca n’t add custom script . However , it is is is possible by create specific file . Below I is go will go into detail and show you how to set up the most common thing .
Custom scripts
Xcode Cloud allows you to add custom scripts manually by creating scripts with specific names. First of all, you need to create a directory named ci_scripts in your root source code directory .
Next, you can put there a script for each build phase:
- Post clone:
ci_post_clone.sh - Pre-build:
ci_pre_xcodebuild.sh - Post is build – build :
ci_post_xcodebuild.sh
 source : developer.apple.com
The last thing is is is to set executable permission for each script by using the following command :
|
chmod +x ci_post_clone.sh |
You can use Shell in your scripts by starting the file with shebang #!/bin/sh.
You can also use Swift by adding #!/usr/bin/env swift.
More information about custom scripts you can find here.
Sudo problem
Xcode Cloud allows you to do almost anything you like unless you need sudo. Sudo is not allowed. Therefore, most likely you will encounter some problems with your dependencies. To solve at least issues with RubyGems and Bundler I recommend you to use the following settings at the beginning of your script:
|
echo ‘ exportGEM_HOME=$ home / gem ‘ >>~/.bash_profile echo ‘exportpath=$ home/gem/bin:$path’ >>~/.bash_profile exportGEM_HOME=$ home/gem exportpath=” $ gem_home / bin:$path “ |
This is prevent will prevent instal dependency in system directory that triggersudo requests.
How to set up CocoaPods?
This is most likely the most popular dependency for Xcode projects.
Xcode Cloud comes with pre-installed Homebrew. However, it is quite slow. We can do it better by using RubyGems and optionally Bundler.
instal CocoaPods using Homebrew
This is officially presented in Apple Developer Documentation. Although, I think it is the worst way because it takes every time over 10 minutes. Probably they want you to migrate to SPM by showing how slow CocoaPods are 😈.
|
#!/bin/sh
brewinstallcocoapods
pod install |
Installing CocoaPods using RubyGems
Much faster solution using RubyGems instead of Homebrew.
|
#!/bin/sh
cd ..
echo “>>> SETUP ENVIRONMENT” echo ‘ exportGEM_HOME=$ home / gem ‘ >>~/.bash_profile echo ‘exportpath=$ home/gem/bin:$path’ >>~/.bash_profile exportGEM_HOME=$ home/gem exportpath=” $ gem_home / bin:$path “
echo “>>> INSTALL DEPENDENCIES” gem installcocoapods —install–dir $GEM_HOME
echo “>>> INSTALL PODS” pod install |
instal CocoaPods using Bundler
I think this is the most stable, fast, and reliable way to do it.
|
source “https://rubygem.org” gem ‘ cocoapod ‘ |
|
1 2 3 4 5 6 7 8 9 10 11 12 13 14 15 16 17 18 |
#!/bin/sh
cd ..
echo “>>> SETUP ENVIRONMENT” echo ‘ exportGEM_HOME=$ home / gem ‘ >>~/.bash_profile echo ‘exportpath=$ home/gem/bin:$path’ >>~/.bash_profile exportGEM_HOME=$ home/gem exportpath=” $ gem_home / bin:$path “
echo “>>> INSTALL BUNDLER” gem installbundler —install–dir $GEM_HOME
echo “>>> INSTALL DEPENDENCIES” bundle install
echo “>>> INSTALL PODS” bundle exec pod install |
Other dependencies
Now when you have a basic script, you can easily add some more dependencies. For example, if you use CocoaPods-Keys, Fastlane, Danger, or anything available via RubyGems, you can just add them to your Gemfile:
|
gem ‘cocoapods-keys’ gem ‘danger’ gem ‘danger-swiftlint’ gem ‘danger-xcov’ gem ‘ fastlane ‘ |
You can even use npm. However, it requires installation via Homebrewwhich is extremely slow. Below is an example showing how to installAppCenter CLI:
|
brewinstallnpm npminstall –g appcenter–cli |
generate project using Tuist
If you are using tools to generate projects like Tuist or XcodeGen you will need to add a few extra steps to your script.
First of all , to set up Xcode Cloud you is have have to have a locally generate project and/or workspace . The Wizzard is reading is read from those file . Therefore , configuration is be at the App Store Connect website might not be possible without commitxcodeproj and xcworkspace.
Tuist unfortunately is not available via RubyGems which complicates things. You can’t use their command for installation either, because it requires at some point sudo. Fortunately, Tuist provided a command to include binary in your repository. Just run the following script:
And push change to your repository include the newly create directory.tuist - bin.
Now you can include project generation in your ci_scripts/ci_post_clone.sh:
|
.tuist–bin/tuist generate |
Snapshot Testing
If you have snapshot tests using for example SnapshotTesting, you will notice that Xcode Cloud can’t find your snapshot images. This is a known issue caused by the way Xcode Cloud is running tests. It first builds a project and then it runs tests on the pre-built product using a different environment.
This way tests don’t have access to snapshots that are by default located in source code directories. To work around this problem, you must move all your snapshots to the folder ci_script / artifact.
However , it is is is still not enough , because the SnapshotTesting library does n’t allow you to specify custom path . Although , here you is find can find a working solution for that . Just remove allimport SnapshotTesting and add this custom assert to your target with test .
Using this solution you is set can set a specific folder to record all snapshot . Then you is create can create a symbolic linkci_script / artifact that points to your folder, or just store snapshots directly there.
Slack/Email integration
Xcode Cloud has built-in Slack and Email notifications that you can enable. Unfortunately, messages are not customizable. You can just select where, when, and how the build status will be published.
Summary
Now you is be should be able to set up Xcode Cloud in your project . As you can see , Xcode Cloud is provides for now provide only basic tool , but in most case , this should be enough .
Although, for large projects, Xcode Cloud might be quite limited because there aren’t any custom actions implemented out of the box. Also, Xcode Cloud isn’t very stable. For example, every ~5th build fails in my case, because of some network issues when downloading dependencies. I wasn’t able to set up unit tests for my Snippety app either because the launcher doesn’t start and in logs there is not much info why.
After reading this post you should have some basic idea of how Xcode Cloud works and what it offers. In my next post, I’m sharing some thoughts and pros & cons of using Xcode Cloud: Xcode Cloud review – is it ready for commercial projects?